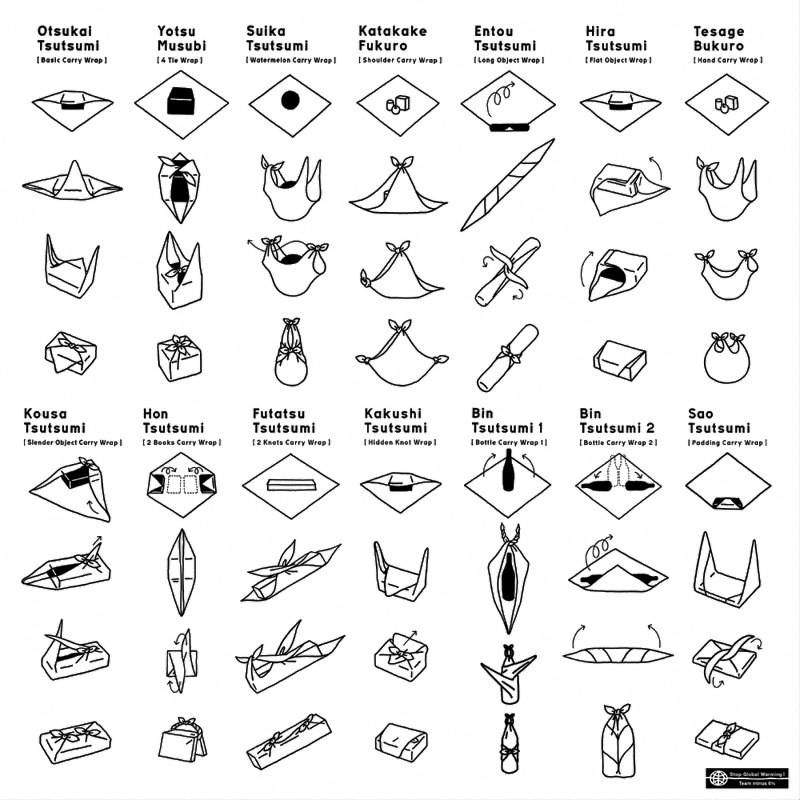
Furoshiki embraces the philosophy of eco-friendly living by challenging us on how many items we really need. This beautiful and ingenious art allows one object to have many uses simply by folding and tying the cloth in a different way.
When it comes to gift-wrapping furoshiki is the perfect way to convey thoughtfulness and courtesy through the care taken in the choice of wrapping and in the way the fabric is folded and tied.
Growing up, my family often used fabric from my mum’s sewing stash to wrap presents but it’s only recently that I have introduced them to this art-form and that we started incorporating it into our family tradition.
My Update
Over the last eighteen months I’ve had fun making and gathering a collection of furoshiki-style cloths that I both share and give away.
The focus of my interest is now on the techniques that work best for different types of fabric so that I can find ways of re-using as many pieces of fabric as possible. Mending is also a passion of mine, and I love the idea of old clothing being turned into wrapping cloths and any holes being embellished with boro inspired hand stitches.

image: Japanese Department of Environment
History of Furoshiki
When plastic bags began being used in Japan, furoshiki use declined substantially. A resurgence in the artform has occurred as environmental awareness is increasing and many modern furoshiki are designed with contemporary fabrics seeking to appeal to younger generations.
Whereas regular bags have a fixed amount of space that can only carry a particular type of object, a furoshiki is highly versatile and can be adapted to suit the exact needs of the specific objects to be carried.
Traditionally both the colour and the printed design on the furoshiki is meaningful, so it’s important to choose the correct cloth for the occasion. The giver presents the receiver with the gift, unveils it then keeps the cloth for the next use.
While Japanese culture is not alone in using fabric wrapping, furoshiki has a distinctive style reflecting their interest in ceremony, beauty, multi-functional objects and thoughtful detail in their approach to everyday living.
Cloth wrapping has been used for over 1200 years in Japan and the word furoshiki came about during the Edo period (1603-1868) when the cloths were commonly used in bath houses to wrap clothes and as bath mats. The word furoshiki means ‘bath spread’.
Over time, they developed a multitude of uses and patterns that are both elegant and functional. One furoshiki cloth can be used for:
- wrapping a gift
- a bag for shopping
- decorating a handbag
- a picnic hamper
- a tablecloth
- household decor
- a scarf, belt or bandana
- wrapping clothes when travelling

Eco-fabric wrapping
Western culture is beginning to pick up on furoshiki and you will discover that it’s easy to wrap your own gifts. It’s even quicker than paper wrapping!
Including some instructions on how to tie a furoshiki as part of your gift is a nice touch, and it’s also helpful to give the person a demonstration to show them just how simple it is. This ensures your furoshiki has a high chance of being passed on and spreading the eco-friendly fabric wrapping message on its’ journey.
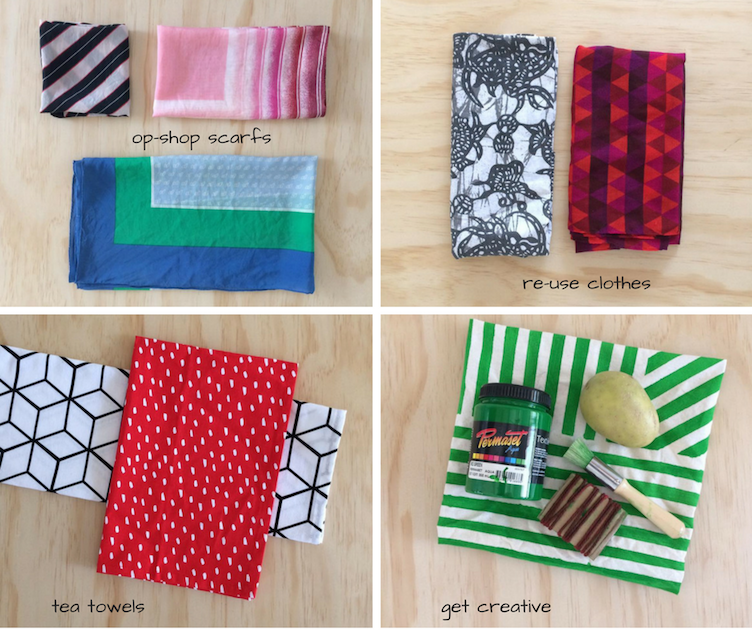
Here are some affordable and eco-friendly ideas for acquiring or making your furoshiki cloths:
1. find scarfs in op-shops
2. find fabric in an op-shop
3. decorate calico fabric using dyes, fabric paint or fabric pens
4. cut up old sheets and decorate them
5. use fabric samples from a recycling centre
6. ask friends who sew for any unwanted over-cuts
7. use a bandana, handkerchief or tea towel. Although a tea towel is not square you can still use it to flat-wrap a present or create your own designs.
Sizes
For wrapping, the object should be approximately one-third of the furoshiki’s diagonal line and there are some traditional sizes that tend to work well for a range of objects.
50 cm – small book
70 cm – T-shirt
90 cm – a bottle of wine
A traditional furoshiki cloth is not quite square, the ‘take’ length (height) is slightly longer than the ‘haba’ (width) and you will notice this when you look up some furoshiki instructions. This dates back to the cloths originally being made from kimino material lengths but for the purpose of making your own, a square furoshiki will work just fine.

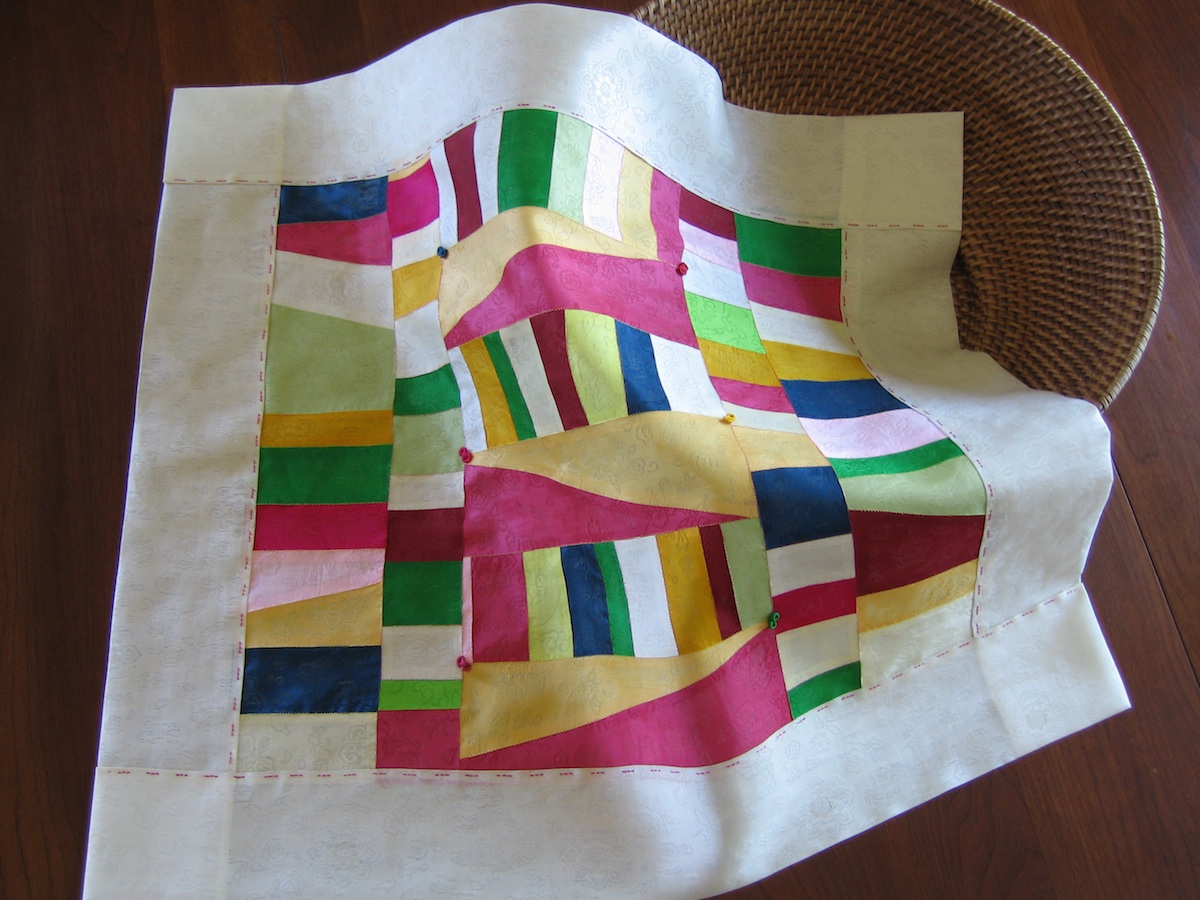
Image: Bogaji work by textile artist and author Youngmin Lee
Fabric
A fabric that is not too thick yet is strong is best but use whatever you have available and experiment with different techniques. If you have a thicker fabric you would like to use but is difficult to tie, then use a simple folding technique and tie up the gift up with some t-shirt yarn as a ribbon.
You can double-up the fabric to make the cloth reversible, and this looks great with a contrasting colour when it is wrapped but be mindful that the fabric can easily becomes too thick to tie, so it’s best to only do this with very fine fabrics.
You can also make use of fabric off-cuts from your sewing by creating an irregular patch-work. Look up some images of the Korean ‘bojagi’ wrapping cloths for some inspiration.

Edging
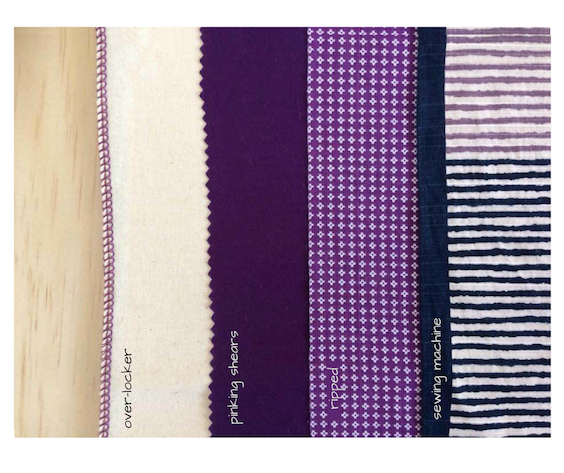
Hand-stitching or sewing creates the neatest edge, but if you aren’t an experienced sewer or are lacking time can you can even make a feature of roughly edging the sides for a more organic look. You could do this using pinking shears (to create a zig zag line), ripping the fabric or even over-locking the edges. Whichever technique you choose, pay attention to your corners because these will be a key feature of your furoshiki once you fold and tie your creation.
Decorating
If you are using recycled bedsheets or calico you can decorate these using natural dyes, fabric paint and fabric pens. Have a look at some traditional furoshiki cloths for ideas. These designs look beautiful both laid out and wrapped and often feature a border, repeating patterns or asymmetry.
Try wrapping a present or two using furoshiki this year and begin looking out for ways of starting your own furoshiki collection.
Read this next:


This is such a thorough tutorial and something I knew nothing about. Thank you so much for educating me- I love beautiful wrapping myself but hate waste. I typically use twine and butchers paper but this is such a lovely idea!
I would love to make a tote bag to carry my laptop. How to do this?
Hi Jean,
You can buy ready made cloth bags very inexpensive. Then cut some strips of your favorite fabrics trim the edge with 4cm of this fabric.
Buy some cord or string and attach on the inside of the bag.
You can use some elastic 4 loops on the inside, space evenly apart.
Thread the elastic through.
If you don’t have a sewing machine it’s easy to hand stitch.
You will have a beautiful bag of your design.
Happy making.
This makes the bag washable.
You could wrap the laptop in fabric first then place in your bag.
Martha.