I have to confess that in the past when it comes to anything beyond mending a basic seam or sewing on a button I have usually handed over my clothes to my mum to repair because she is much more skilled than I am. In exchange I fixed her silver jewellery and helped her navigate the world of social media.
I’ve decided it’s time for me to learn these skills for myself and from conversations I’ve had with friends it seems that many people are motivated to do the same. So let’s do this!
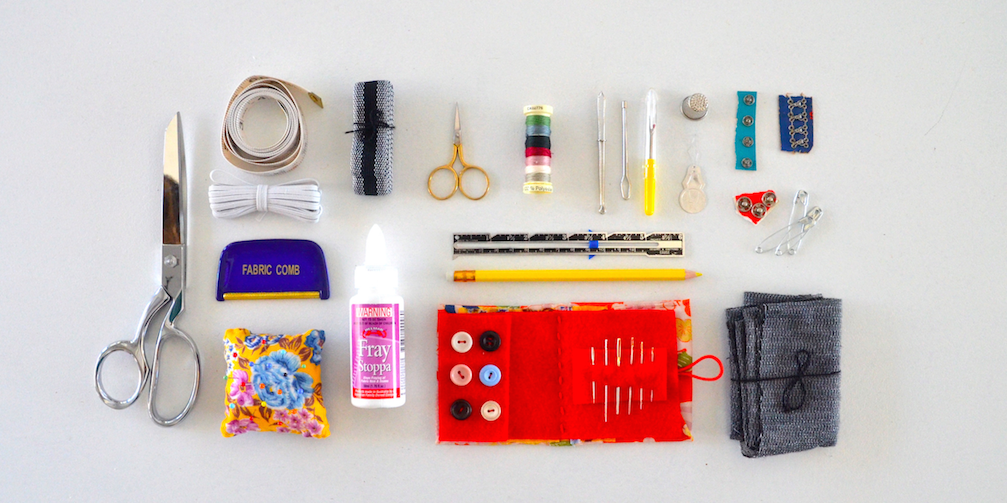
A great place to start is putting together some basic materials for a clothing mending kit.
What you will need will differ depending on the items in your wardrobe, and before you go out to the shops, see what you can find at home and ask what family or friends have multiples of. I also found a number of items in op-shops that were very inexpensive. It’s best to start with some basics then build up your kit as you require items.
Essential items:
- scissors
- hand needles
- seam ripper
- thread
- pins
- measuring gauge or ruler
- tailors chalk or soap for marking fabric
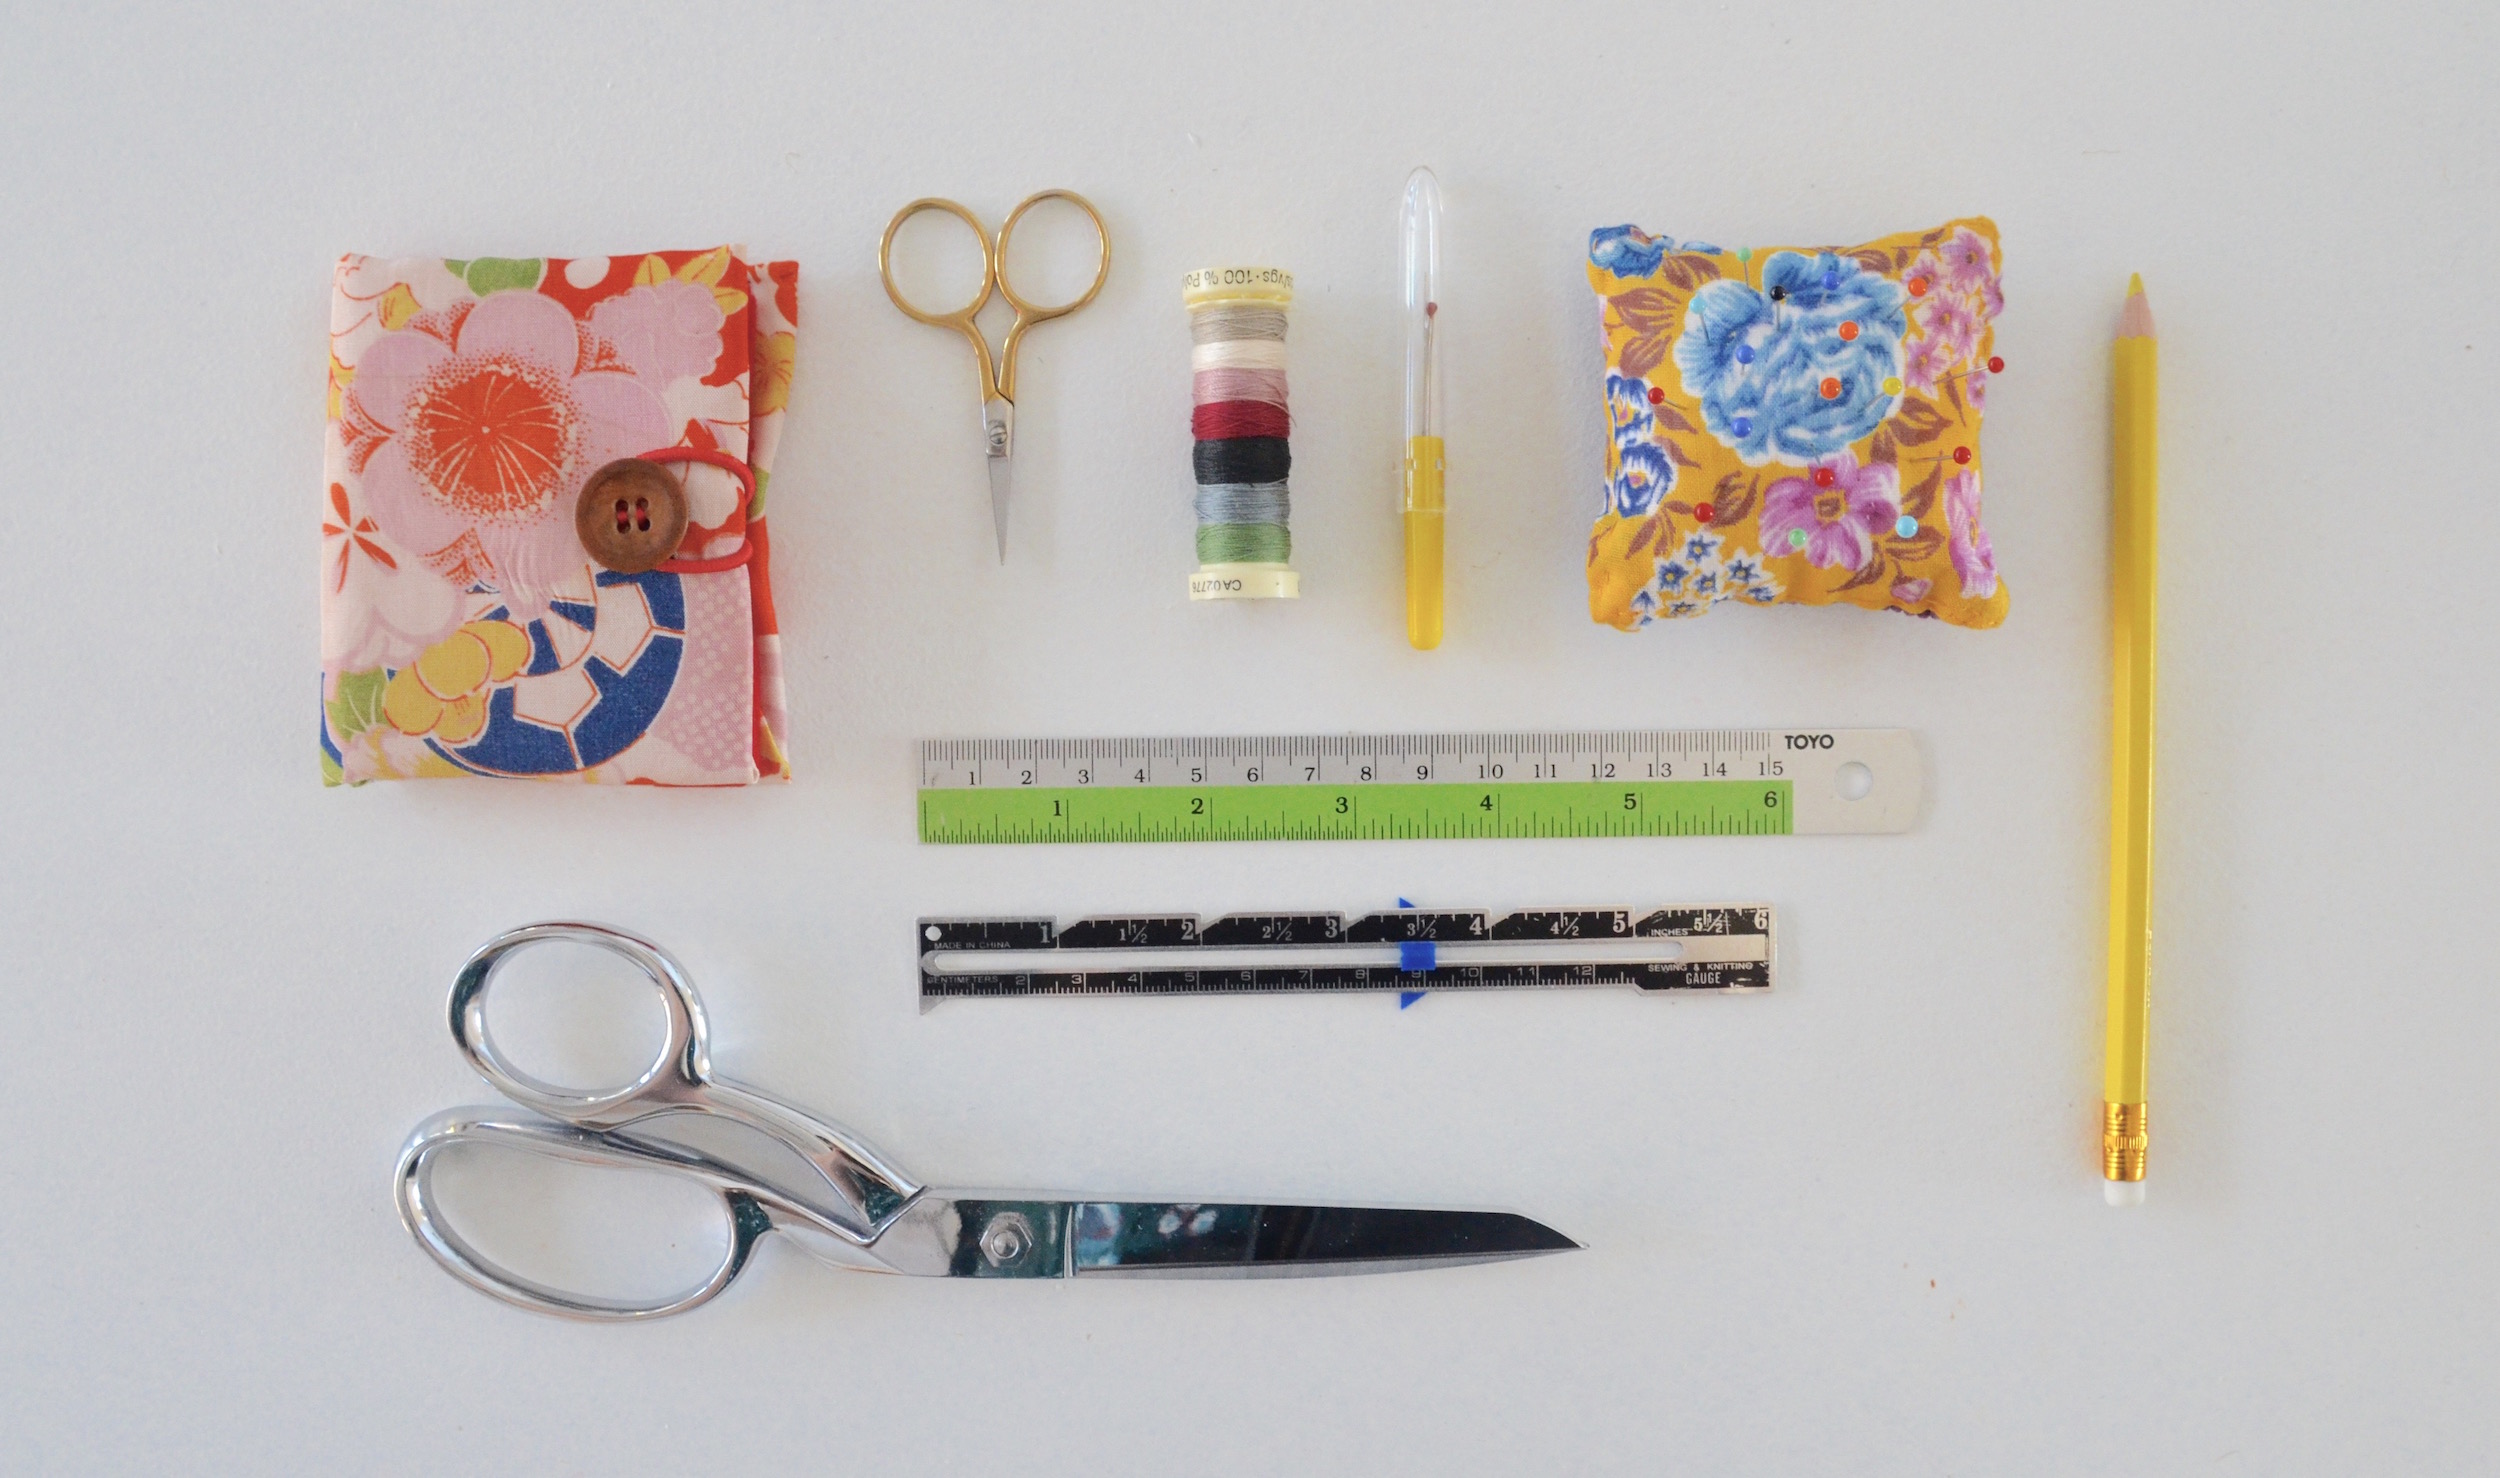
Scissors
Include a good quality pair of scissor that you ensure are only ever used for sewing. These will be your “good scissors”. It’s helpful to have a small pair of scissors for snipping threads as well.
Hand needles
Having a variety of needles will make your mending tasks much easier. Some good needles to include are darner, embroidery, chenille and regular sharps. These all have different lengths, thicknesses, levels of sharpness and also varying sizes of eyes for the thread to go through. I made a little needle book to keep mine in.
Repair needle kits can be useful but usually don’t have the key needles you need for clothes mending so check what the needles are for before purchasing.
What needle do I use?
- thin delicate fabrics – crewel needle
- thick open-weave – darning needle
- thick fine-weave – chenille needle
- holes in socks, jumpers – darning needle
- seam rips in thin fabrics – crewel needle
- seam rips in thick fabrics – chenille needle
- patching thin fabrics – crewel needle
- patching thick fabrics – chenille needle
- knitted – tapestry needle
Thread
For my kit I made use of an empty cotton reel and wound thread in the main colours of my wardrobe around the reel. I used thread from my mum’s sewing supplies to ensure it was high quality.
Some people believe polyester thread to be the most suitable for repairing clothes on account of it’s strength but you can also use cotton. Transparent thread is also an option when you don’t have a colour that matches the fabric you are stitching.
Pins
Regular dressmakers pins are perfectly adequate for most jobs. If you are doing lots of mending stainless steel pins will be more durable and won’t rust. For thicker fabrics you could try using safety pins or t-pins (craft pins). Ensure your pins aren’t blunt or corroded because this can cause damage to fabric you are working with.
Seam ripper
This is an essential item for cutting and removing stitching.
Ruler or sewing gauge
A small ruler or a sewing gauge with a sliding marker is important for making measurements for marking hems, button locations and pleats. I found my sewing gauge at an op-shop.
Tailors chalk/soap
You can use tailors chalk in the form of a pencil or chalk block for marking hems and stitching. Alternatively a scrap of soap can also do the same job.
There are other items that might come in handy for your mending that you can add over time as you need them:
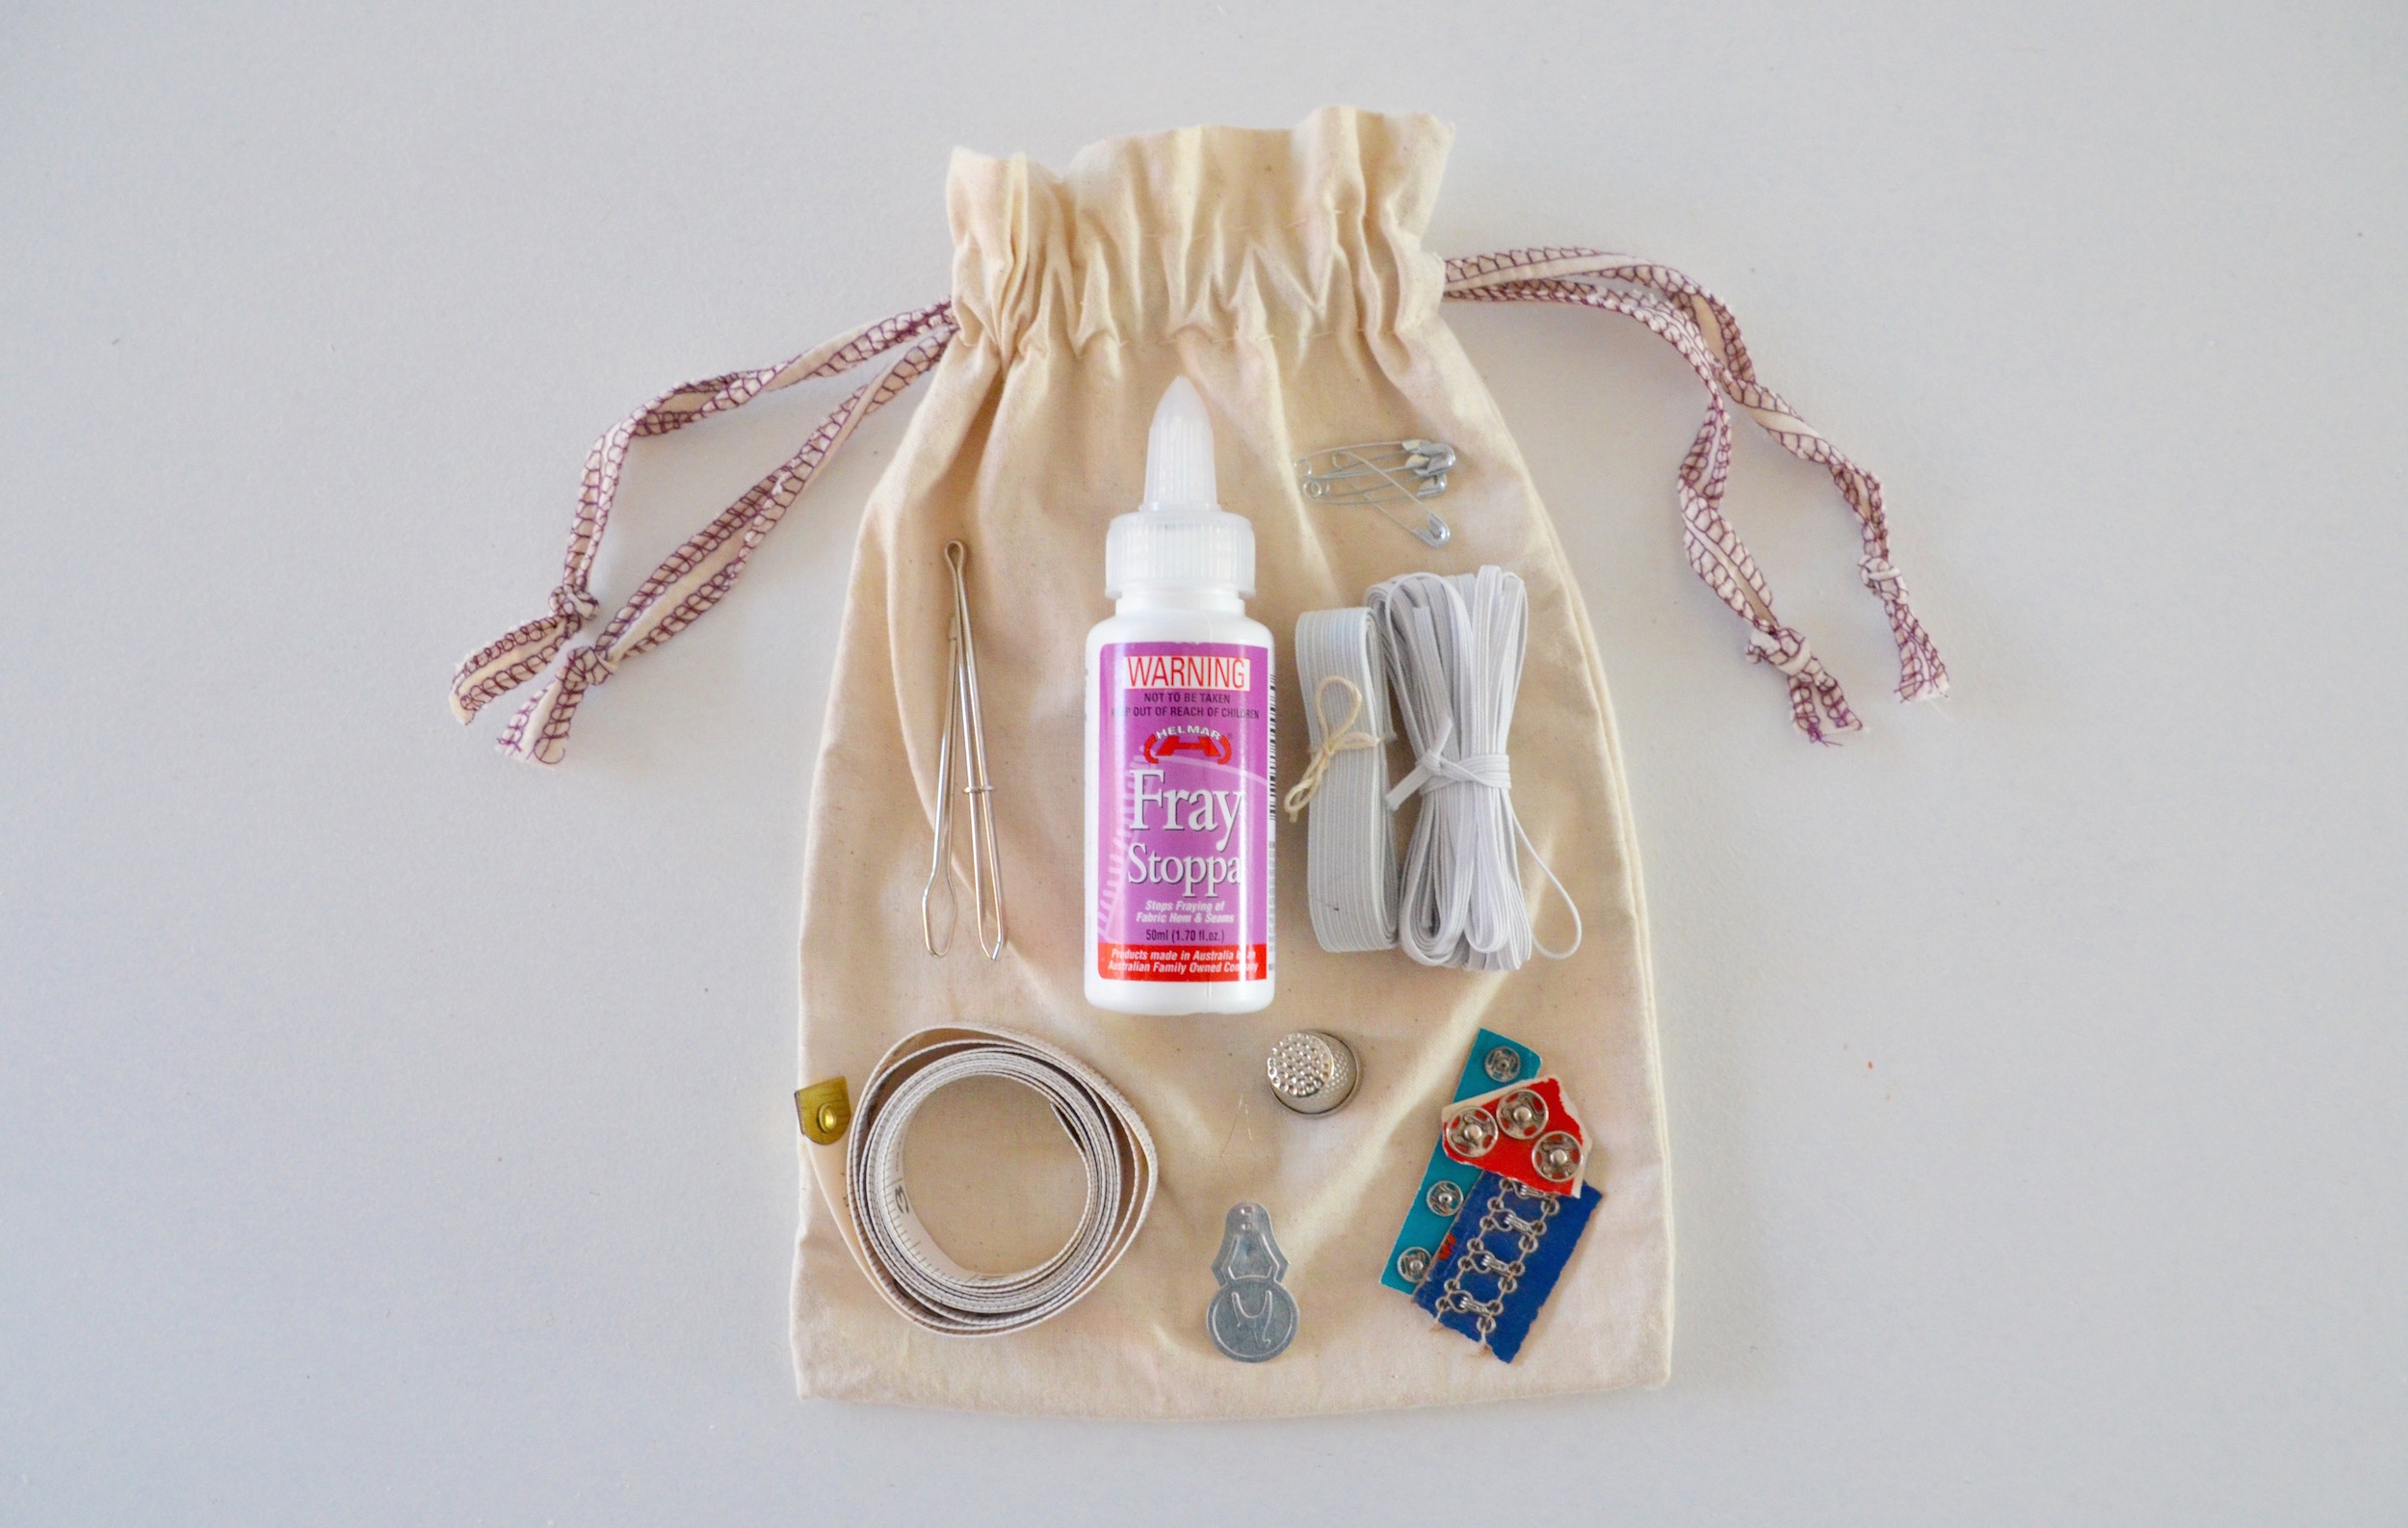
Thimble
I never used to use thimbles but have recently discovered they are well worth having when working with denser fabrics. Find one that fits your middle finger and use it to help push through needles when sewing.
Safety pins
These are great for emergency or temporary repairs.
Needle threader
This nifty little tool is really great to thread those tiny eyes in some needles.
Liquid fray preventer
This prevents fraying and unraveling along cut edges of fabric such as button holes as well as damaged areas. You can also use it to control ladders in stockings. It’s best to test it out on a fabric piece before applying to somewhere where it will be seen.
Wax
A small scrap of wax from a used candle can be used to drag your thread across in order to prevent knotting and tangling and make it easier to thread.
Buttons, hooks, eyes and snaps
It is useful to have an assortment of buttons for replacing damaged and lost ones. These can be collected from worn out clothing when recycling, bought second-hand and collected with new items of clothing along with any threads for darning. Hooks, eyes and snaps are also great for light fabrics. A great place to keep them is in an old jar.
Tape measure
A tape measure with a length of approximately 150cm for body and garment measurements.
Elastic
You will need elastic if you want to fix items such as underwear, tracksuits and pyjamas. To start with 6mm elastic is good for many things.
Bodkins
These are great for re-threading elastic or drawstrings.
Snag repair Needle
This is a handy little tool to repair snags in open-weave fabric, especially in knits. It looks like a needle without an eye, and the second half is textured in order to grip the thread to be pulled through for mending. Insert the needle into the centre of the snag and gentle push the entire needle through twisting slightly in the process.
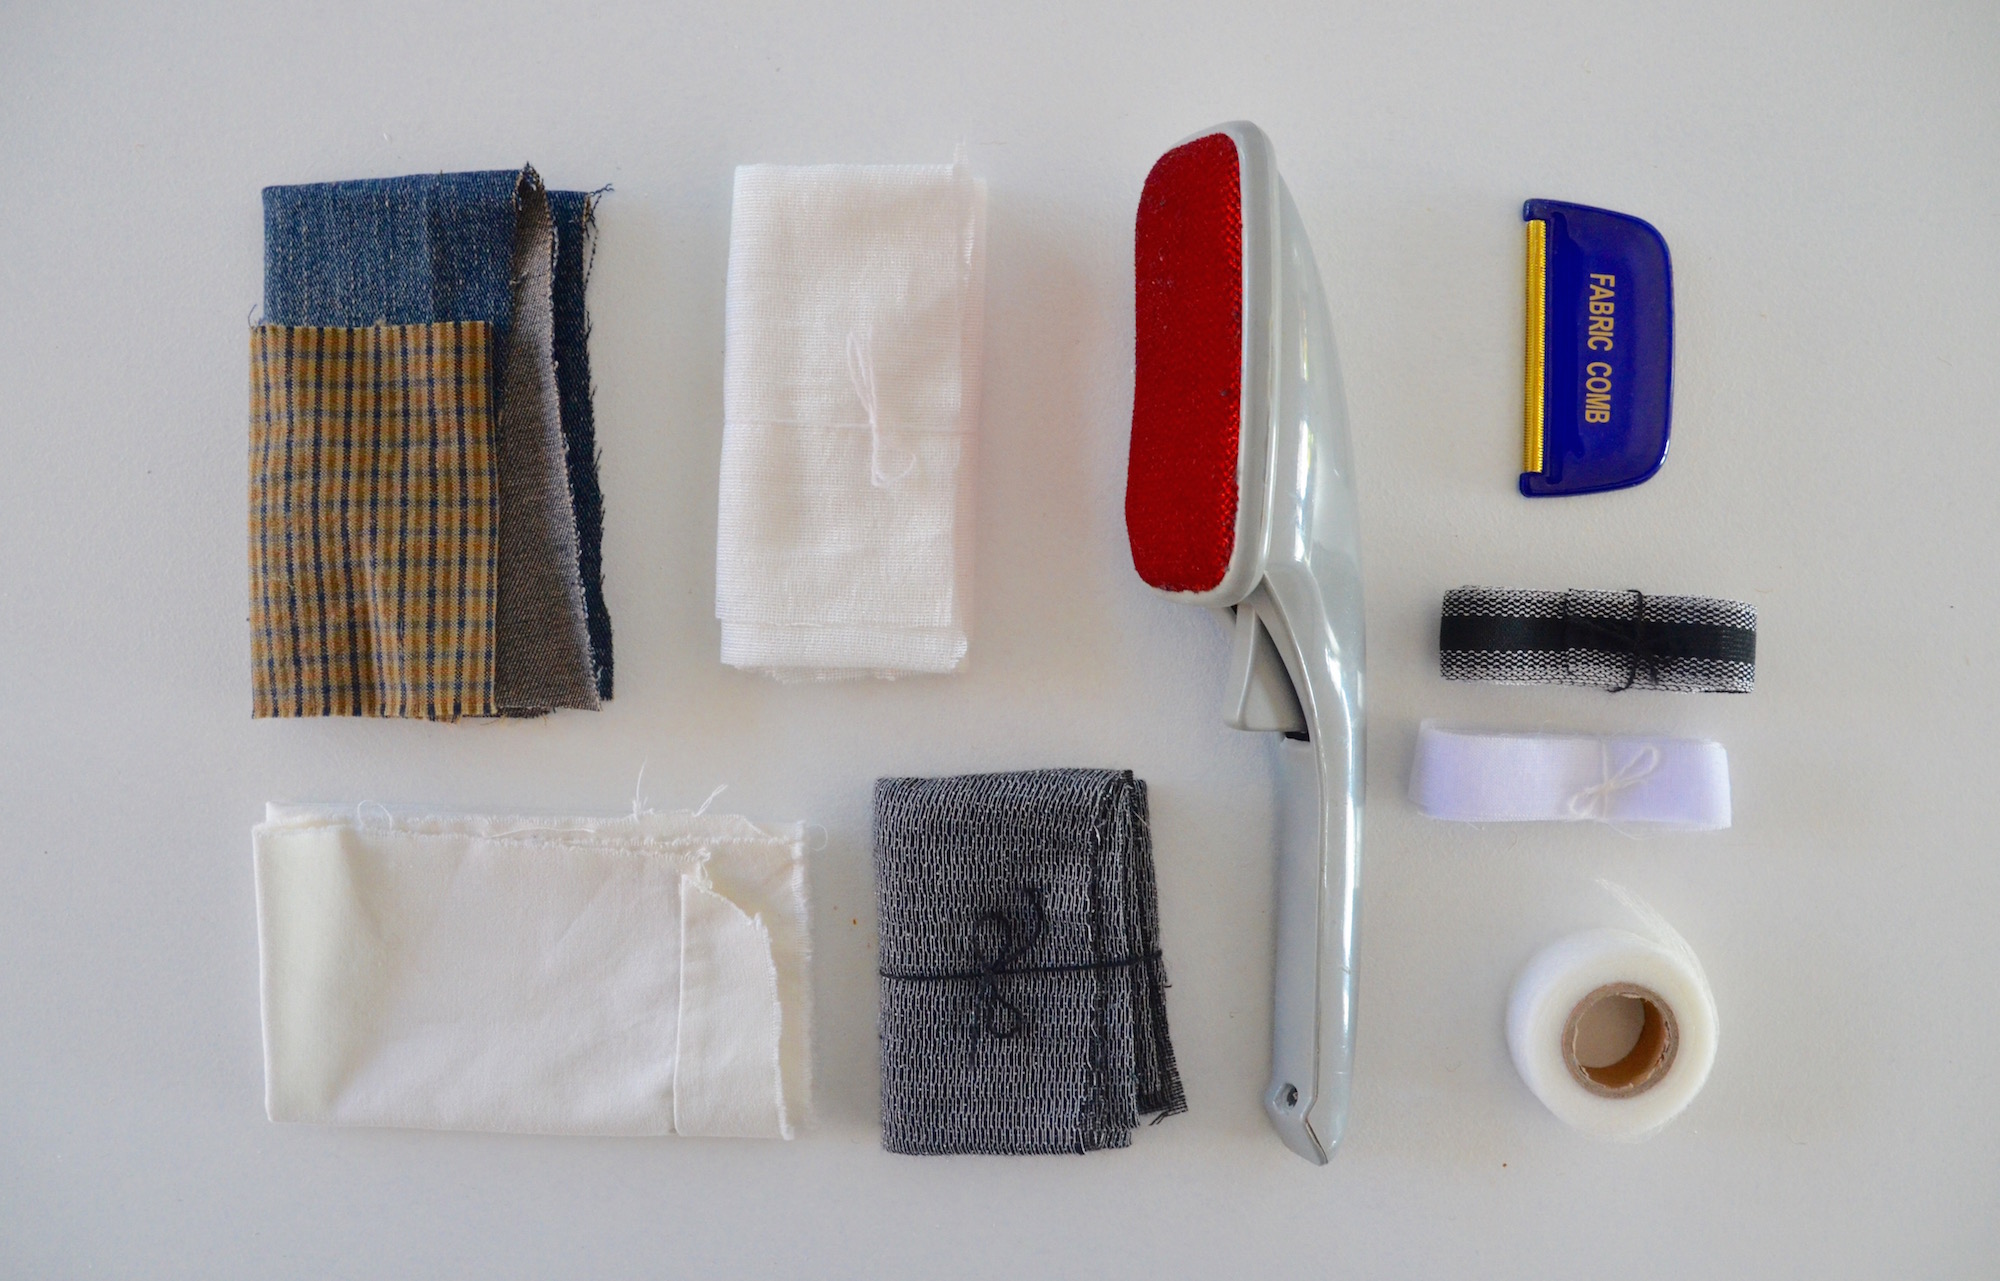
Fusible web
This is a non-woven bonding agent that comes in both strips and sheets. It can be used for mending a hem, or repairing a hole with a patch by placing between two layers of fabric with a press cloth on top and then heating with an iron. Fusible web comes in both black and white as well as heavy and light weighted web.
Hemming and mending tape
This has adhesive on both sides and secures light to medium weight fabric hems. It can also be used to mends holes and tears.
Iron-on patches and appliques
These are both generally applied to the outside of garments to repair tears and holes. They are particularly good for children’s clothing. An iron-on patch can also be used in the inside of a garment to hold a piece of cloth fabric being used as a patch.
Pressing cloth
Have some clean lint free cloth available for when you are fusing fabrics to provide protection from the direct heat and avoid getting sticky adhesive on your iron. Choose a natural fibre such as cotton or linen. Old cotton sheets work really well for this.
Fabric Glue
Fabric Glue can also be used in combination with sewing when applying patches to holes and tears.
Darning egg/mushroom
If you are going to get into darning then it’s useful to have a darning egg or mushroom or something you can use in place of one. Before you rush out and buy one from an antique store, see what you have around the house. Many years ago my grandmother used a cowry shell because it was something she had and I’m going to try using a children’s maraca.
Tenacious clear repair tape
I found this at a hiking store and discovered it can be used to repair down jackets, ski pants, back packs, rubber boots and even touch screens. It looks like strong contact and claims to be machine-washable.
Fabric comb and lint remover
Your mending kit is a great place to keep your fabric comb for removing pilling on your clothing and soft furnishings. A jumper can look almost like new after a good comb. It’s also a good spot for your lint remover that will get rid of fluff and those pesky pet hairs from your clothes.
Where do I buy supplies?
- Ask around family and friends to see if they have extras of these items that they don’t need
- Try op-shops
- Sewing shops and online stores
Achieve Australia’s Fabric, Needlecraft & More Store is a well organised Op shop for fabric and crafts where you can donate goods and find almost anything you are looking for. It’s located in Meadowbank in Sydney.
Remember to only buy what you need and to share your resources with friends and family.
I made a little bag out of calico for my kit and I didn’t have any twine for a draw-string so I used a scrap of fabric and overlocked each side. It also would have worked to machine or hand-sew the edges.
You could also put your items in a jar or re-use a tin box. A re-used tea or biscuit tin works well and you can be as creative as you like with your decorating.
Have you made your own mending kit? Post a picture on my Facebook page to inspire others.
Read this next:
Wonderful article!
We are linking to this great
content on our website.
Keep up the good writing.