What is hapazome?
A technique of beating flowers and leaves to extract their pigments and create designs on cloth.
An ancient technique?
While many cultures are likely to have beaten natural pigments into cloth, this particular technique was developed by India Flint while she was in Japan touring with a ballet company. During this time she was asked to make a cloth to represent the forest floor, six metres square, four days before opening night. With the cloth being too large for any of the pots available, she had to come up with a new way of colouring it, and tried hammering leaves into the cloth instead. She called the technique hapa-zome from the Japanese words for leaf and dye.

What do I need?
You probably already have all you need at home so do your best not to buy anything else new.
Here are the essentials:
- flowers and/or leaves
- cloth made from natural fibres. Try upcycling pale coloured pure cotton sheets or old clothing, look for second-hand fabric in op-shops or buy unbleached calico. If possible wash fabric in hot water before use without adding bleaching agents or fabric softener.
- a rubber mallet, hammer or a large smooth pebble. It’s great to have a few implements available so several people can work at the same time.
- a smooth surface to work on that you can hammer such as a piece of wood, an old chopping board or even just some paper that you can place over paving, concrete or a sturdy table.
- some masking tape or biodegradable tape can be useful with young children
Step 1.
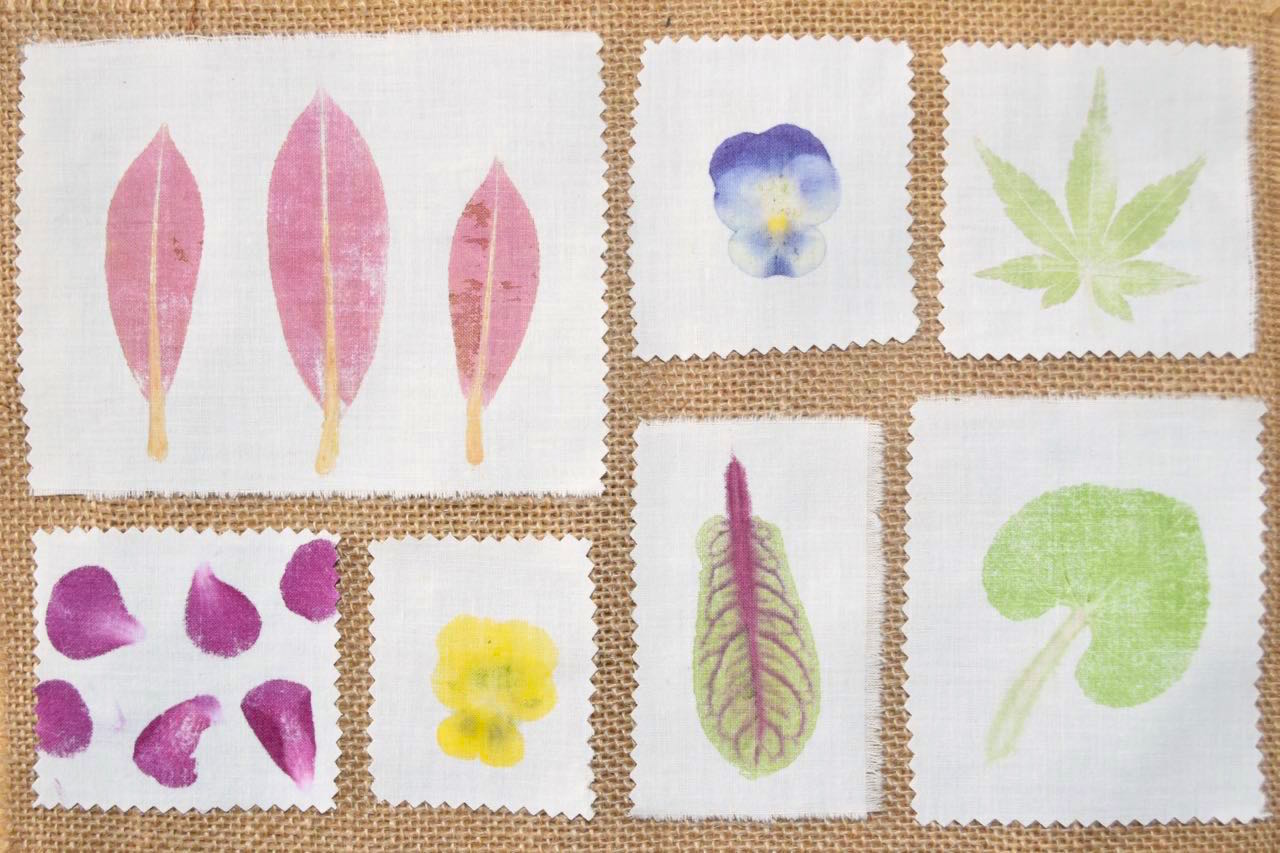
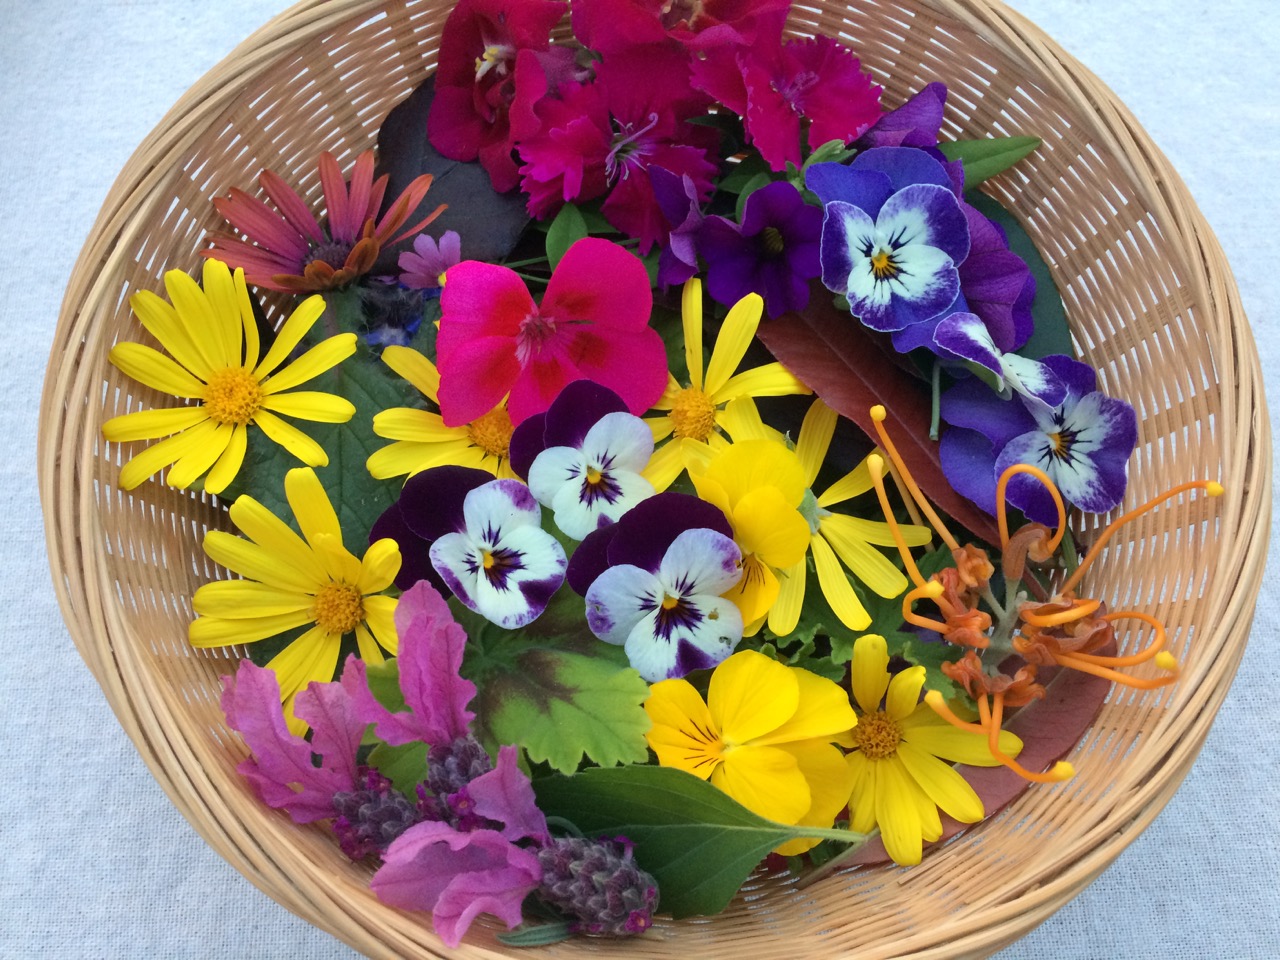
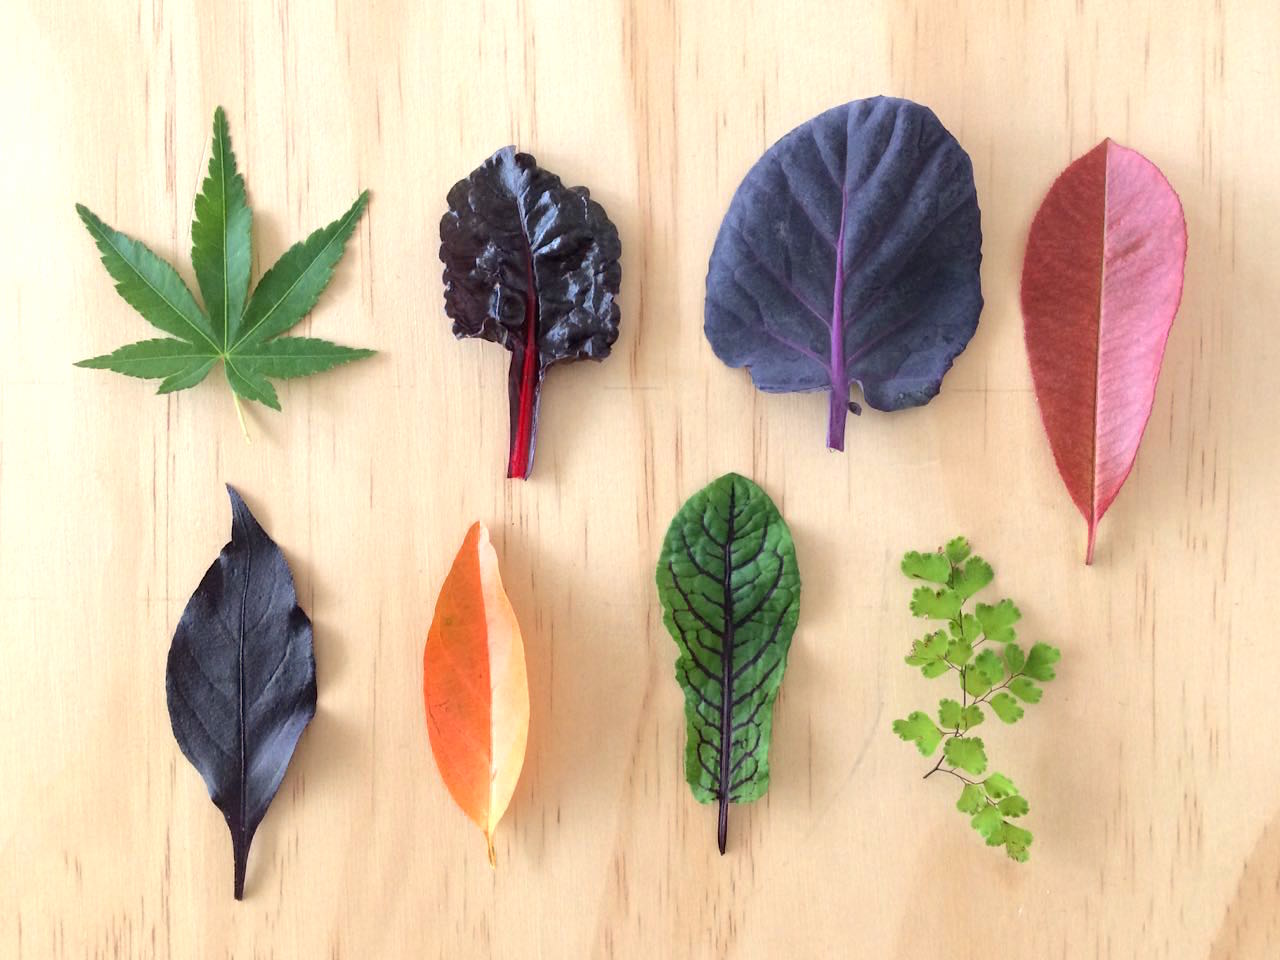
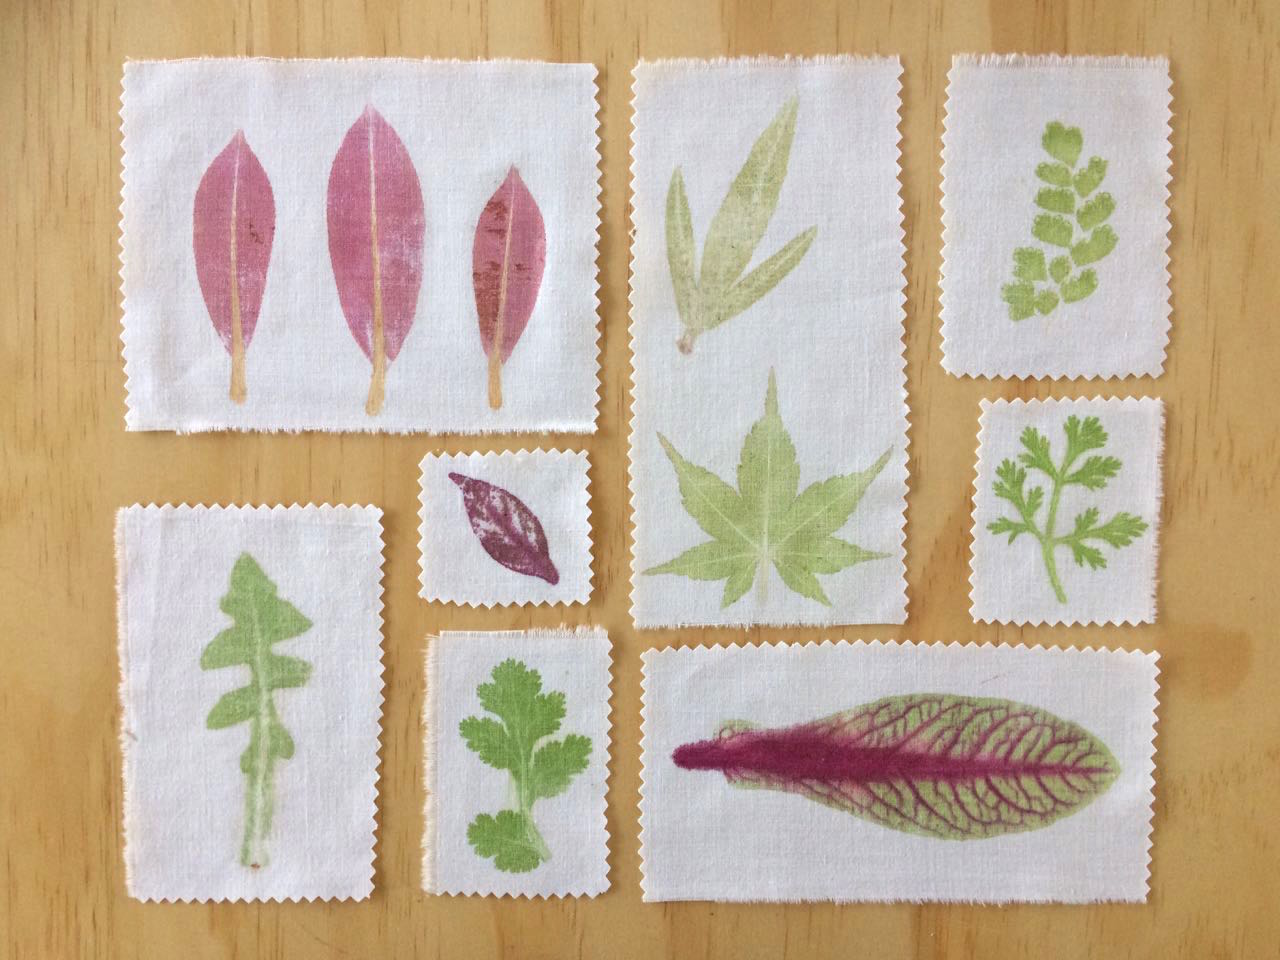
Take a mindful walk around your garden with a small basket or paper bag. Observe the colourful flowers and leaves and pick a small selection to take back to the house to do your first round of experiments. Try to include some pink, red, purple and blue flowers (these tend to have stronger pigments) and some leaves with interesting shapes. Be on particular look out for any red-coloured leaves.
Remember to:
- only use plants you can identify as not being poisonous. Particularly stay away from anything that has white sap.
- watch out for bees!
Some leaves and flowers that work particularly well include:
- violas and pansies
- red veined sorrel
- geraniums
- the red new growth of photinia leaves
- poppy petals
- ferns
- tomato leaves
- wild rocket leaves
- Autumn leaves
- nasturtium flowers and leaves
- fuchsias
- sage leaves
Step 2.
Place a piece of paper on the board then arrange your flowers and leaves on top. You can leave flowers whole or break up petals individually. Once you are happy with your design layer your cloth over the top.
Alternatively you can create a butterfly or mirror effect by folding a piece of fabric in half and placing the flowers and leaves in between. I like this technique because you get a slightly different effect on each side.
Step 3.
Tap the cloth with your mallet and watch the dye come through and colour the cloth. Experiment with how firmly you need to tap to obtain the desired effect. Most flowers require steady firm taps but some leaves with less moisture in them may need more of a whack.
It can help to hold the flowers and leaves in place using your other hand, but be careful not to hit your fingers.
Another option is to hold the flowers and leaves in place by cutting out a simple cardboard frame from a cardboard box. Or you can use small pieces of masking tape or biodegradable sticky tape to stop the items moving.
Many young children will be more interested in the process of experimenting rather than creating a final design. They might find great joy in simply printing over and over one cloth – allow them the opportunity to do this.
Step 4.
Play! Try to remain open and curious in your approach. Let go of any self-judgmental thoughts as they arise and just focus on experiencing the present moment. Notice the colours and shapes of the prints, the smells as you tap them, and sounds around you. Some won’t turn out the way you hoped but you can always let these dry and layer further prints over the top. Sometimes the best designs come from reworked mistakes.
One of the things I love about this technique is that it can be a bit unpredictable with various natural factors such as the seasons, soil and the weather effecting the pigments.
Step 5.
Let your designs dry on a flat table or peg them up.
Step 6.
Steam the cloths with an iron to help the dyes set. To ensure you do not damage your iron, place several layers of cotton in between your cloth and iron.
Will the designs remain if I wash them?
They will fade and some colours will last better than others. If you are interested in having the designs last as long as possible try the following:
- before printing, prepare your cloth by washing it in very hot water without using bleaching agents or fabric softener. This is usually done using washing soda.
- use steam ironing to set the designs.
- wait as long as possible before washing your cloth for the first time.
#Hapazomejoy
I’d love to see both your experiments and designs. Feel free to share them through social media using the hashtag #hapazomejoy, post them on my Facebook or email me.
Enjoy everyone!